 |
| Maritime Archaic Fish Spear Reproduction |
This is kind of a cool piece that I just finished for Port au Choix National Historic Site. Its a reconstruction of a Maritime Archaic Indian fish spear based on barbed bone and antler points that were recovered in the 4400-3300 BP cemetery at the site. The wood and binding material were not preserved, but there are several interesting details preserved on the barbed points that assist with recreating the tool.
 |
| The spear has a light pine shaft and measures 2.25m long. The 3 prongs are antler and are secured with gut hafting. The whole thing is covered in red ochre. |
 |
| Maritime Archaic artifact tray |
I started the reproduction by reviewing photos of the original artifacts and visiting The Rooms to see the actual artifacts. I've made the barbed points on their own in the past, but I've never tried assembling them into a functional tool before. Many of the long barbed points are quite straight, while others have a warped appearance. I think that I'd always assumed that they started out straight and that some had warped through taphonomic processes in the ground. Which might still be true, but I also think that some of the flow and curves in the points were intentional. I built some of those curves into the design of this reproduction.
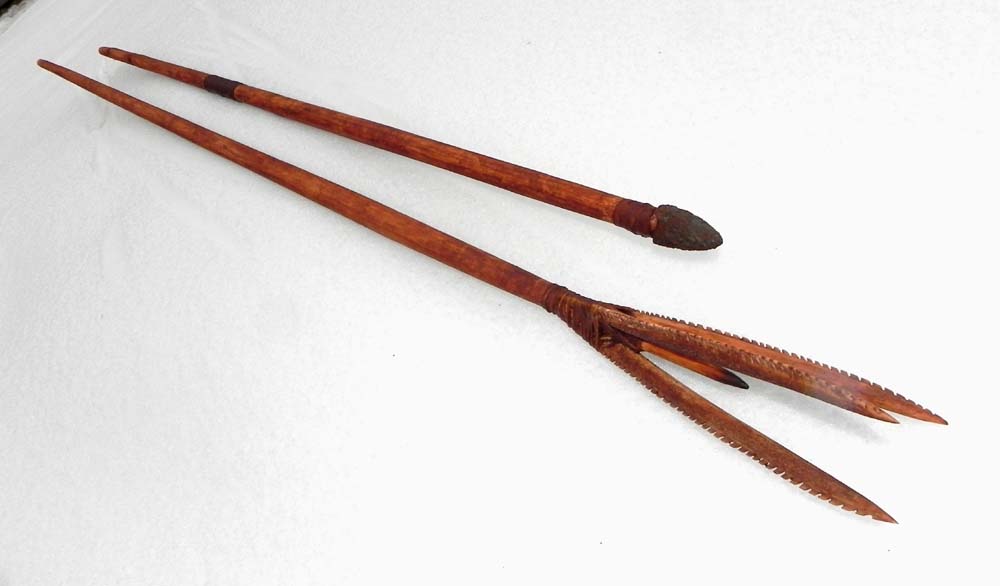
 |
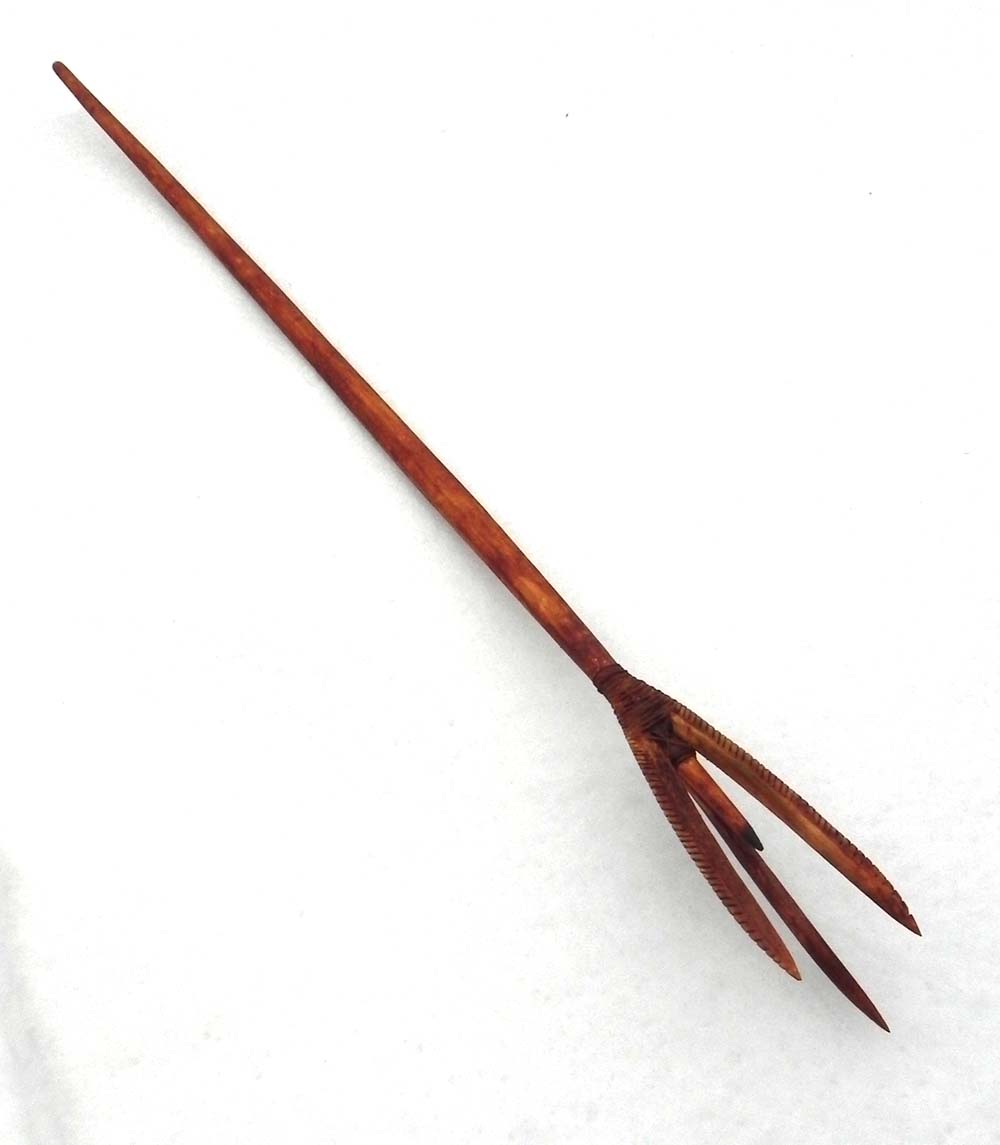
| I used the top spear as my inspiration |
 |
| 7ft + |
I used the general shape of the top artifact in the above photo as my reference. The bottom barbed point is straight, but the curve in the top piece is perfect for a forked fish spear. The sinuous bend in the point makes it look a little warped or twisted when its lying in a tray, but it you imagine it as one prong of a leister or trident type spear, then the slight S-shape looks perfectly well planned and executed.
 |
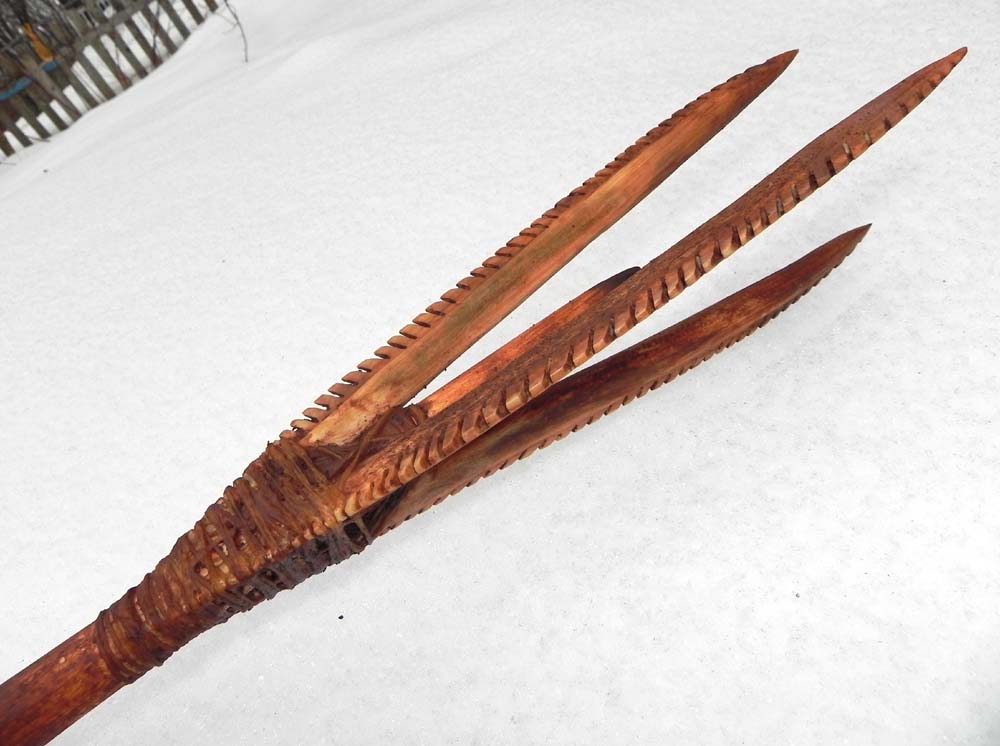
| The prongs came from a single antler |
The sinuous shape of the barbs was relatively easy to accomplish. I split a beam of caribou antler in half and then in half again to get 4 matching antler blanks to start with. The subtle bends and curves of the antler were mirrored in all 4 blanks and I worked them down together. I was careful to arrange all the teeth in the solid outer surface of the antler, rather than the more porous interior. Each prong is about 28cm long.
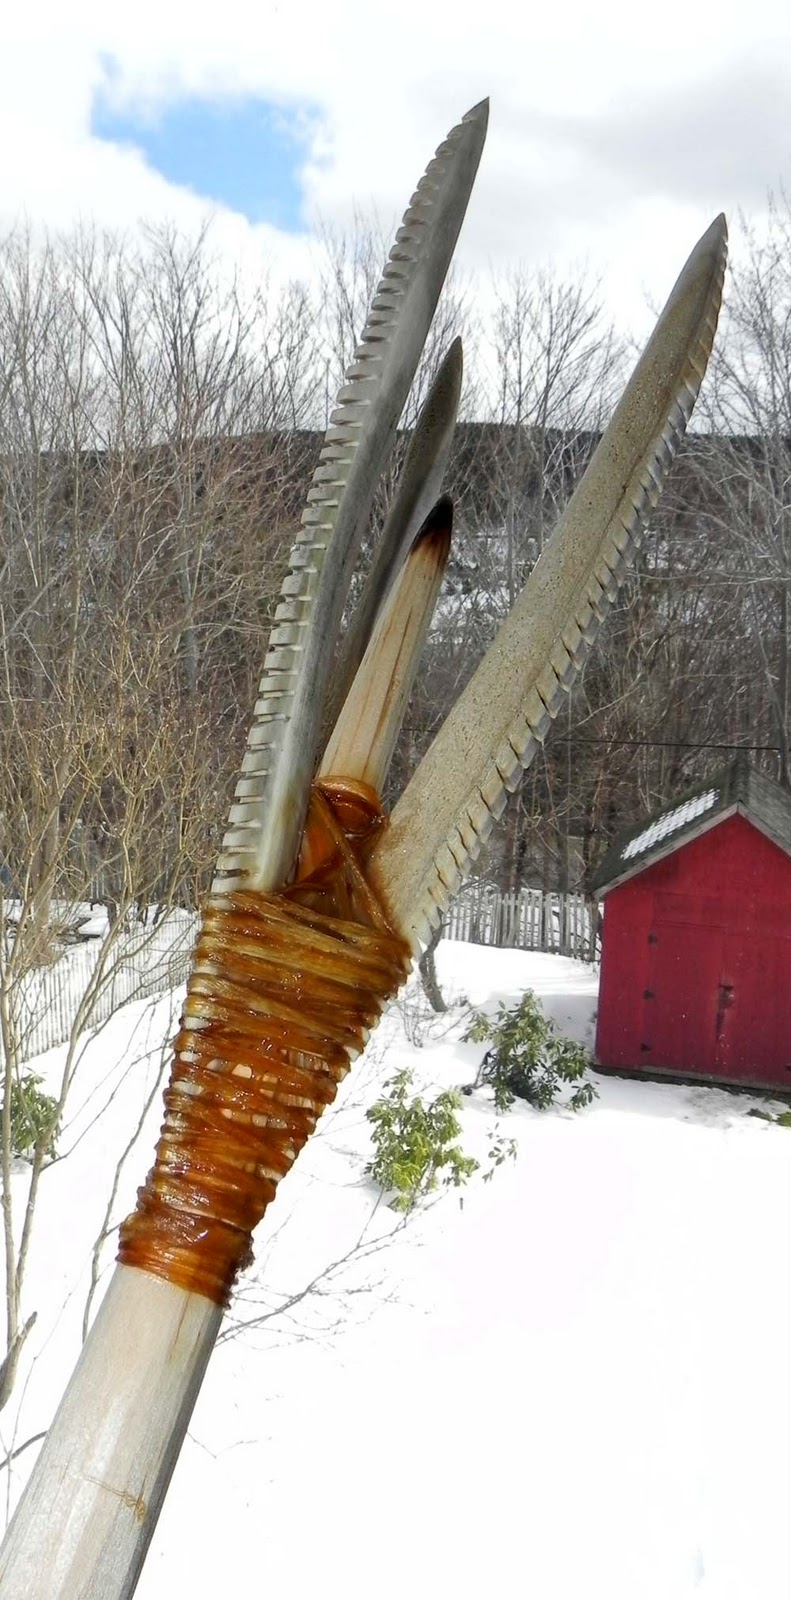
 |
| Barbs change to nubs towards the end |
There are other clues in the arrangement of the barbs along the edge that help plan a hafting strategy. The majority of the teeth cut in the edge are backwards facing barbs, a style of barb that shows up on fishing spears around the world, but a couple inches from one end, the barbs turn to small nubs. Those little nubs are there to facilitate hafting. The spear starts to taper off when the nubs start and the cross-section changes from round or oval to flat, with a bevel along the edge opposite the nubs. I think that beveled ridge is designed to fit into a V-shaped channel cut into the mainshaft of the fish spear and the nubs are there to grip the hafting material that ties the bone or antler spear into place.
 |
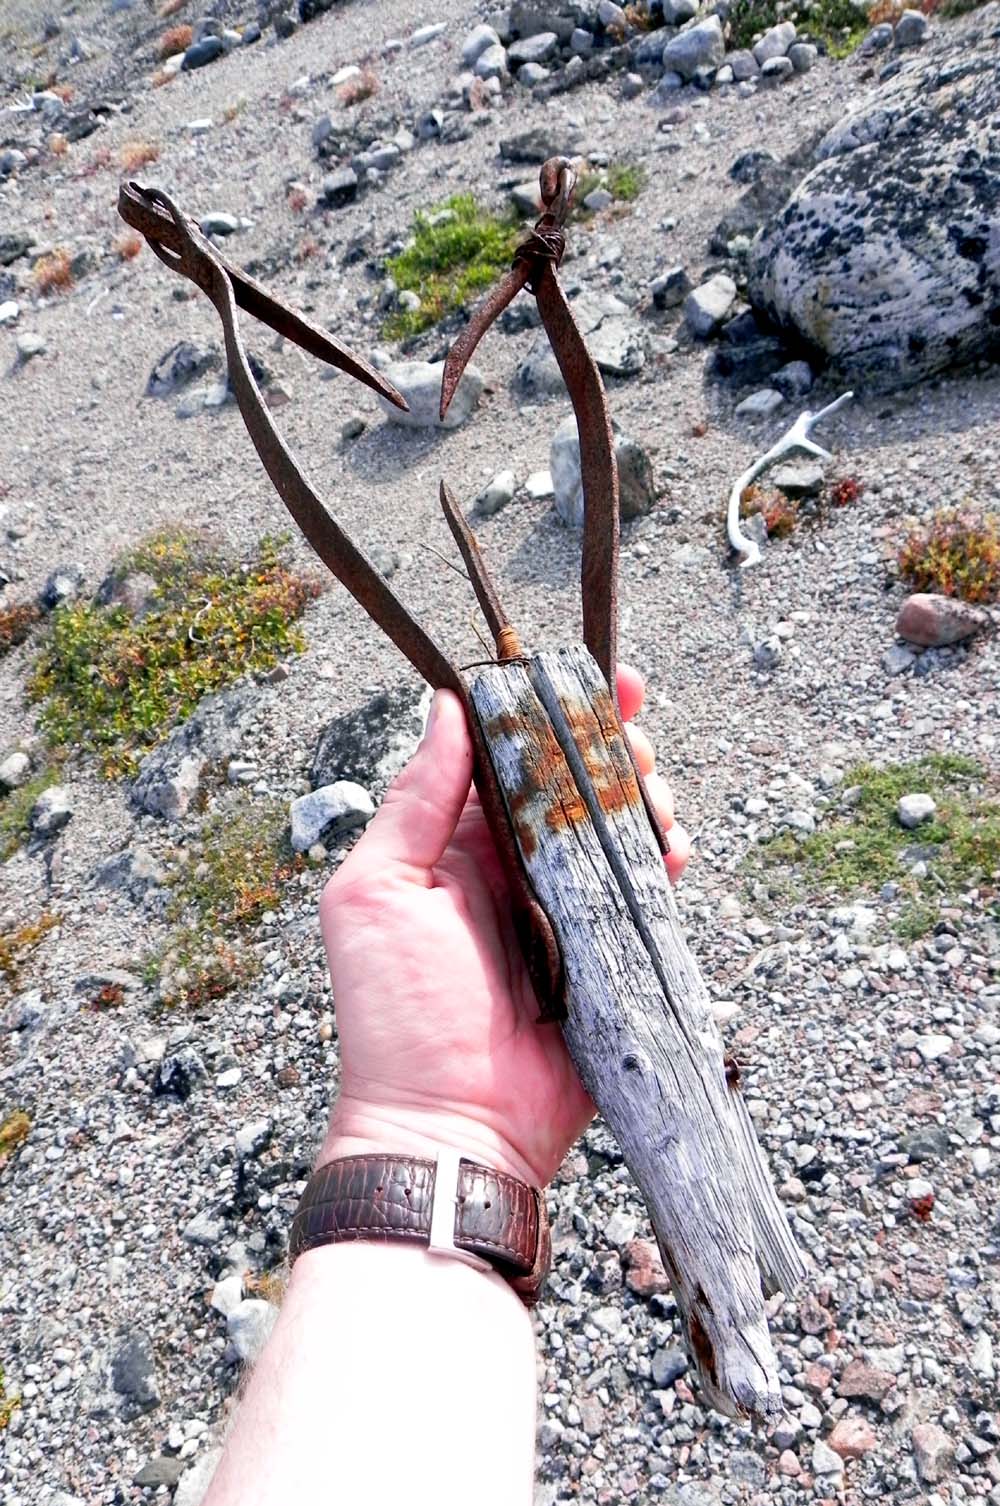
| Leister |
One consequence of this hafting arrangement is that the finished spear will have outward facing barbs. Which makes sense in this style of spear. The spear is designed to pierce right through the body of the fish, not grab it like a leister (left), which has two large prongs with big, inward facing barbs to grab the fish like two giant fingers. The outward facing barbs on the Maritime Archaic spear will have more opportunity to grip the fish as it tries to wriggle off the prongs, than if they were tucked away on the inside of the prongs. Fish spears with inward facing barbs do exist in the same style as the spear that I've made here, but apparently the Maritime Archaic Indians preferred outward facing barbs on their fish spears.
 |
| Squidy! |
The specific arrangement and number of barbs on the spear is speculative. When Millie Spence at Port au Choix placed the order she asked for a 3-prong spear. I like the look of the 3 prong spear. When you look down the prongs from the fish's point of view it looks like a squid reaching out to grab its prey. I'd love to try different numbers and arrangements of prongs in future reproductions. I think anywhere from 1-5 prongs would be reasonable reconstructions based on the artifacts and ethnographic fish spears. Some of the straight barbed spears could have been hafted as single prongs and probably still worked.
 |
| Single prong |
 |
| multiple prong fish spear |
 |
| Bird spear with prongs placed midway down the shaft |
The Inuit made throwing darts with similar barbed points hafted midway down the shaft for hunting birds. I think the concept there is similar to shooting into a flock of geese with a shotgun - the prongs increase the "spread" of the spear. However, I've only seen bird darts with inward facing barbs. I think they are designed to grab and tangle in the flying bird's limbs and neck. The outward facing barbs on the Maritime Archaic spears wouldn't be much help in that style of dart unless they penetrated the body of the bird and I don't think that was necessarily the goal with that sort of weapon. To me, the orientation of the barbs on the Maritime Archaic Indian barbed points at Port au Choix suggest fishing rather than bird hunting.
 |
| Too little contact |
I made the mainshafthafting around, but I could have just as easily ended the mainshaft in a bulb and sunk the points more deeply into the wood so that they could be tied directly onto the wood. I lost sleep trying to figure out how to tie the barbed points on. Initially I simply wrapped the gut around and around through the hafting nubs, but the tapered shape of the wood shaft meant that most of the lashing only made contact with the antler spear points, and not the wood. That's not a good hafting solution. It didn't make the most of the hafting area. If the shaft flared at that point, instead of tapering then there could have been more contact with the wood as well as the antler, but that's not what I had to work with.
 |
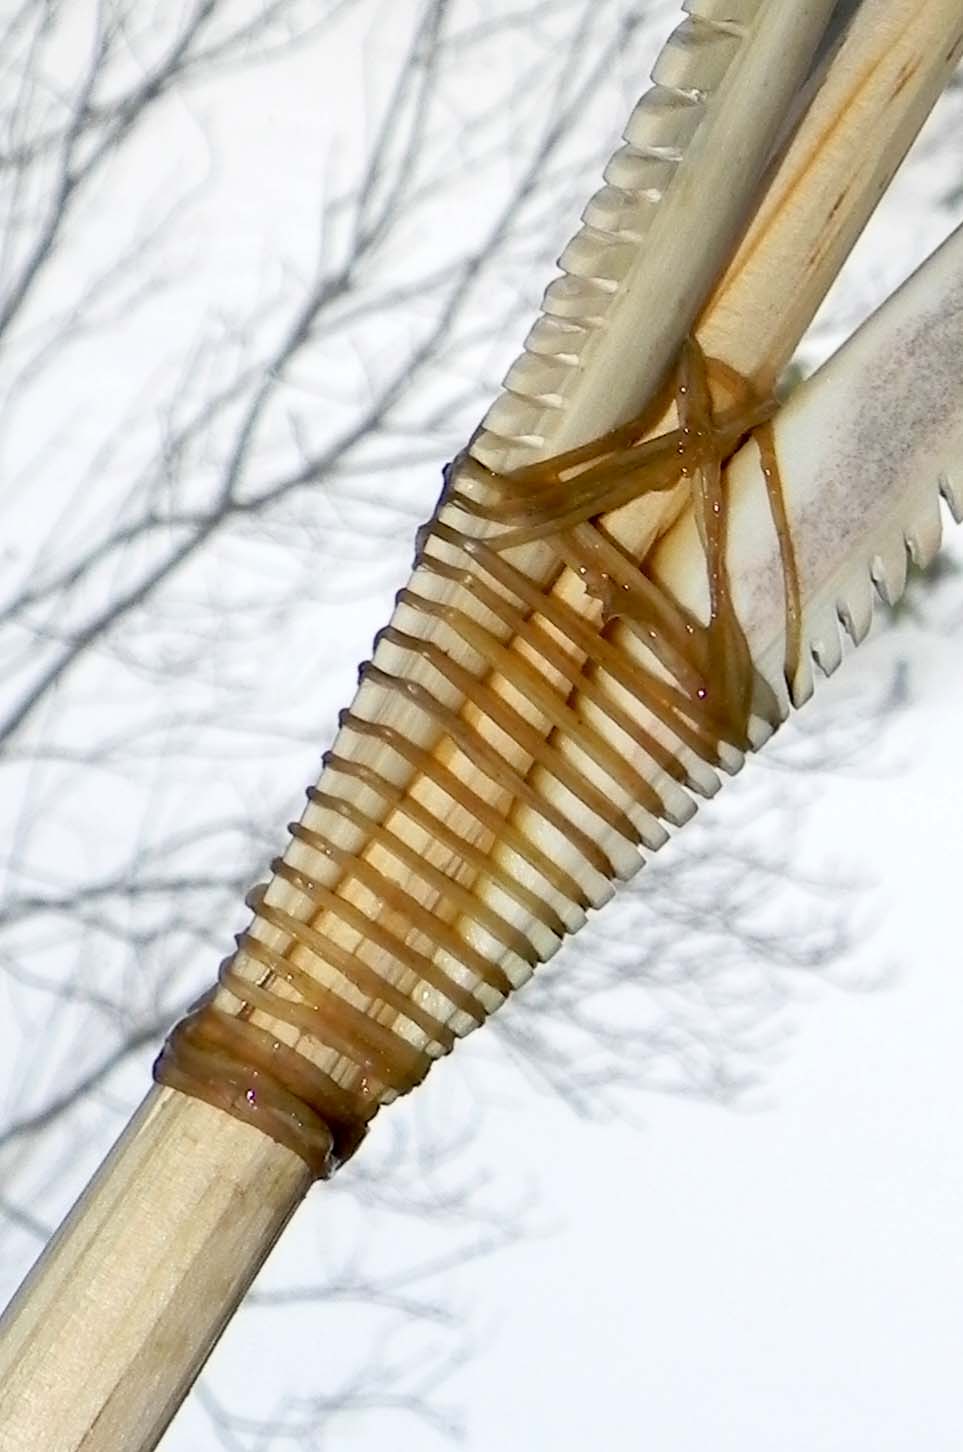
| This feels more secure |
Finally I figured out a lashing pattern where I alternated loops around each individual antler prong and the central prong which gave me a lot more contact between the hafting material, antler, and wood. The gut crisscrosses and lies down against the wood in the channel between each prong. Then there is a final wrap of the gut cord over the whole area that closes in the gap. There's more binding and its arranged better. It felt solid and secure when it went on wet and feels even better dry. Of course, in use this would be wet all the time, so I'm happy that it feels secure even when the hafting is wet.
 |
| Ochre staining is messy |
I used a 7 foot shaft to suggest a very long spear. It could easily have been several feet longer. These sorts of spear could have very long shafts, but for the sake of transport and indoor interpretive use the 7 foot shaft is still plenty long. I covered the whole thing in red ochre to make it look more Maritime Archaic. The Maritime Archaic Indians certainly coated their belongings with red ochre in ceremonial situations, but I'm not sure if they coated them for day-to-day use in the same way that the later Beothuk did. Still it looks cool and the oil and ochre stain will help preserve the reproductions, so its all good.
 |
| Finished Maritime Archaic Indian fish spear and stone tipped spear |
Photo Credits: Tim Rast


Hey Tim,
ReplyDeleteIn the last sentence you said that you use oil and ochre. What kind of oil and for what purpose? I stain some of my reproductions in ochre and never thought of oil.
By the by, fantastic blog. I follow it all the time.
-Brad-
Hey Brad - good to hear from you! For stuff like this I mix the red ochre with Linseed oil, egg, and water to create a waterproof, colourfast paint based on this recipe:
ReplyDeletehttp://greenwood-carving.blogspot.com/2008/12/how-to-make-home-made-paint.html
There's a Newfoundland recipe for making red ochre paint for painting buildings that uses seal oil as the base:
http://www.fisheriesheritage.ca/redOchre.asp
The above link isn't working for me right now, but maybe it will come back.
The Beothuk are reported to have use caribou grease as a base for their red ochre staining.
Using some sort of vegetable or animal oil makes the paint waterproof, which I think was part of the function of red ochre in Newfoundland's damp climate. Certainly there was a ceremonial significance, but if it helped preserve your equipment against the elements at the same time, then that's a nice bonus.
Linseed oil isn't as traditional as caribou or seal oil, but it doesn't smell as bad either. And its easier to acquire and work with. I like that it dries colourfast - once the oil sets you can handle the reproductions without turning your hands, clothes, and house red.
Wow, what an amazing reproduction. Absolutely gorgeous work Tim!
ReplyDeleteHello Tim, I work for mi'kmaw conservation group, millbrook ns, I am working on a project on tomcod, would it be okay if I used some of these photos to show fishing spears? thanks for your time and you do amazing work.
ReplyDeleteCharlie
Send me an e-mail; elfshot.tim@gmail.com and I may be able to help you out with photos.
Delete